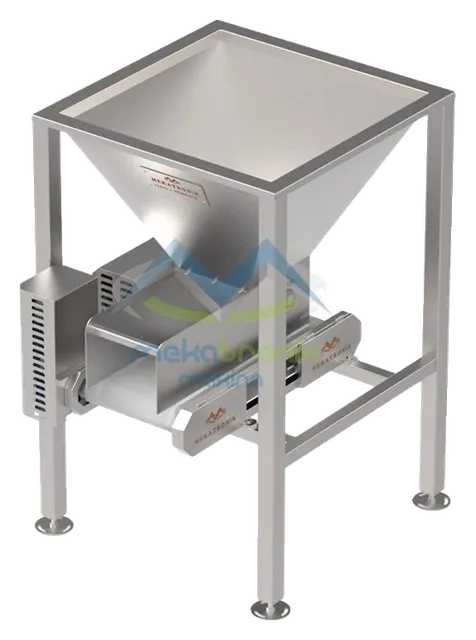
Most residue in a vibratory hopper feeder collects in three places: the corners of the trough, the area around the agitators, and the discharge lip where product leaves the machine. A changeover plan that covers those three places, in that order, removes nearly all carry-over from one dried fruit to the next.
Why a feeder holds residue
A feeder sits at the very start of the line. Product arrives straight from the sack or the bin, so it carries the most dust, sugar and loose skin of any point in the process. Raisins, dried apricots, figs and dates all leave a film when they are warm or freshly opened. The film is thin on a smooth wall and thick wherever the product stops moving.
Vibration normally keeps product moving. Residue builds up where the motion is weakest: right against the side walls, at weld seams, and in the gap behind any part that is bolted into the trough. These are the places to inspect first.
What the construction offers
The vibratory hopper feeder takes product emptied by hand and feeds the next machine at an even rate. Its body and all product contact surfaces are AISI 304 stainless steel, with AISI 316 as an option depending on the process. The trough is built to be easy to clean, and agitators inside it help separate the pieces. Drive is by a geared motor on a 380 V / 50 Hz supply, with PLC or stand-alone control.
Two of those details matter for cleaning. Stainless contact surfaces take hot water and food-safe detergents without pitting or flaking. The agitators are the one part inside the trough that interrupts a smooth surface, so they need their own step in the routine.
Cleaning sequence
Work from the dry stage to the wet stage, and from the top of the trough to the discharge.
- Stop and isolate. Switch the feeder off at the control and lock out the supply before any hand enters the trough. The agitators must not be able to start.
- Empty the trough. Run the last product through so the trough is clear, then brush out what remains. Sweep toward the discharge, not away from it, so loose pieces do not end up inside the next machine's inlet.
- Dry clean first. Remove loose skins, stems and dust with a brush or a vacuum. Wetting dust turns it into paste, and paste is the hardest residue to remove from a seam.
- Reach behind the agitators. Check the shaft entries and the spaces beside each agitator. Sticky fruit packs into these gaps and stays there through many runs.
- Wash down. Use warm water and the detergent set by the plant hygiene plan. Rinse until the water runs clear at the discharge.
- Dry and inspect. Leave no standing water in the corners. Look along the walls and the lip with a light; a film shows as a dull patch on bright steel.
Matching the effort to the product change
Not every changeover needs a full wash.
- Same fruit, different grade or batch: dry cleaning and a visual check is usually enough.
- Different dried fruit with a similar profile, such as raisins to dates: dry cleaning plus a wash of the trough and the agitators.
- A change that involves an allergen or a customer specification: the full sequence, with the result recorded and signed off under the plant's own procedure.
The plant's hygiene plan sets the requirement. The machine only has to make that plan practical, which is the purpose of an easy-to-clean trough.
Sticky fruit and clumps
Clumped fruit is the main source of heavy residue, because clumps break apart in the trough and leave smears. The agitators exist to separate those clumps before the next stage; the effect is covered in separating clumped dried fruit before sizing. It follows that the agitator area collects more than any other region, and it should be checked at every changeover, not only at the weekly wash.
If residue returns quickly in the same spot, look for the cause before increasing the cleaning time. Common causes are an uneven feed that lets product sit, a loose fastener that creates a gap, or a trough that has been loaded harder on one side.
Checks after cleaning
Before the first product of the new run, confirm these points:
- All covers, guards and agitator fittings are back in place and tight.
- The trough is dry, with no standing water at the discharge.
- The feeder starts and the agitators turn freely.
- The first pieces to leave the machine are looked at and, if the product needs it, set aside as a purge.
Fasteners loosen under vibration, so a quick pass over the bolts after every wash is cheap insurance. The wider routine for springs, mounts, motors and welds is in the maintenance guide.
Recording what was done
A short log per changeover helps more than it seems. Note the date, the product leaving, the product arriving, the cleaning level used and who checked it. After a few months the log shows which changeovers cause trouble and which step is skipped, and that is where the routine should be adjusted. Where the feeder is controlled from a PLC, the stop and start times can be kept with the same record.